Create Your Own Cheese + Charcuterie Grazing Board
Want to create a beautiful and delicious grazing board that is sure to wow your guests? We create custom grazing boards by pre-order at Creekside Cheese + Creamery, and today we’re sharing some tips and tricks so you too can create a sumptuous board at home! Read on to find out more!
Step ONE: start with good ingredients. We have plenty of amazing cheese and charcuterie options here at the Creamery, but there are many more wonderful cheesemakers across Canada that also offer astounding cheeses. We recommend sourcing locally produced cheeses; not only does this give your guests a “taste of this place” but it also supports your local farmers and community - and they need your support more than you can know.
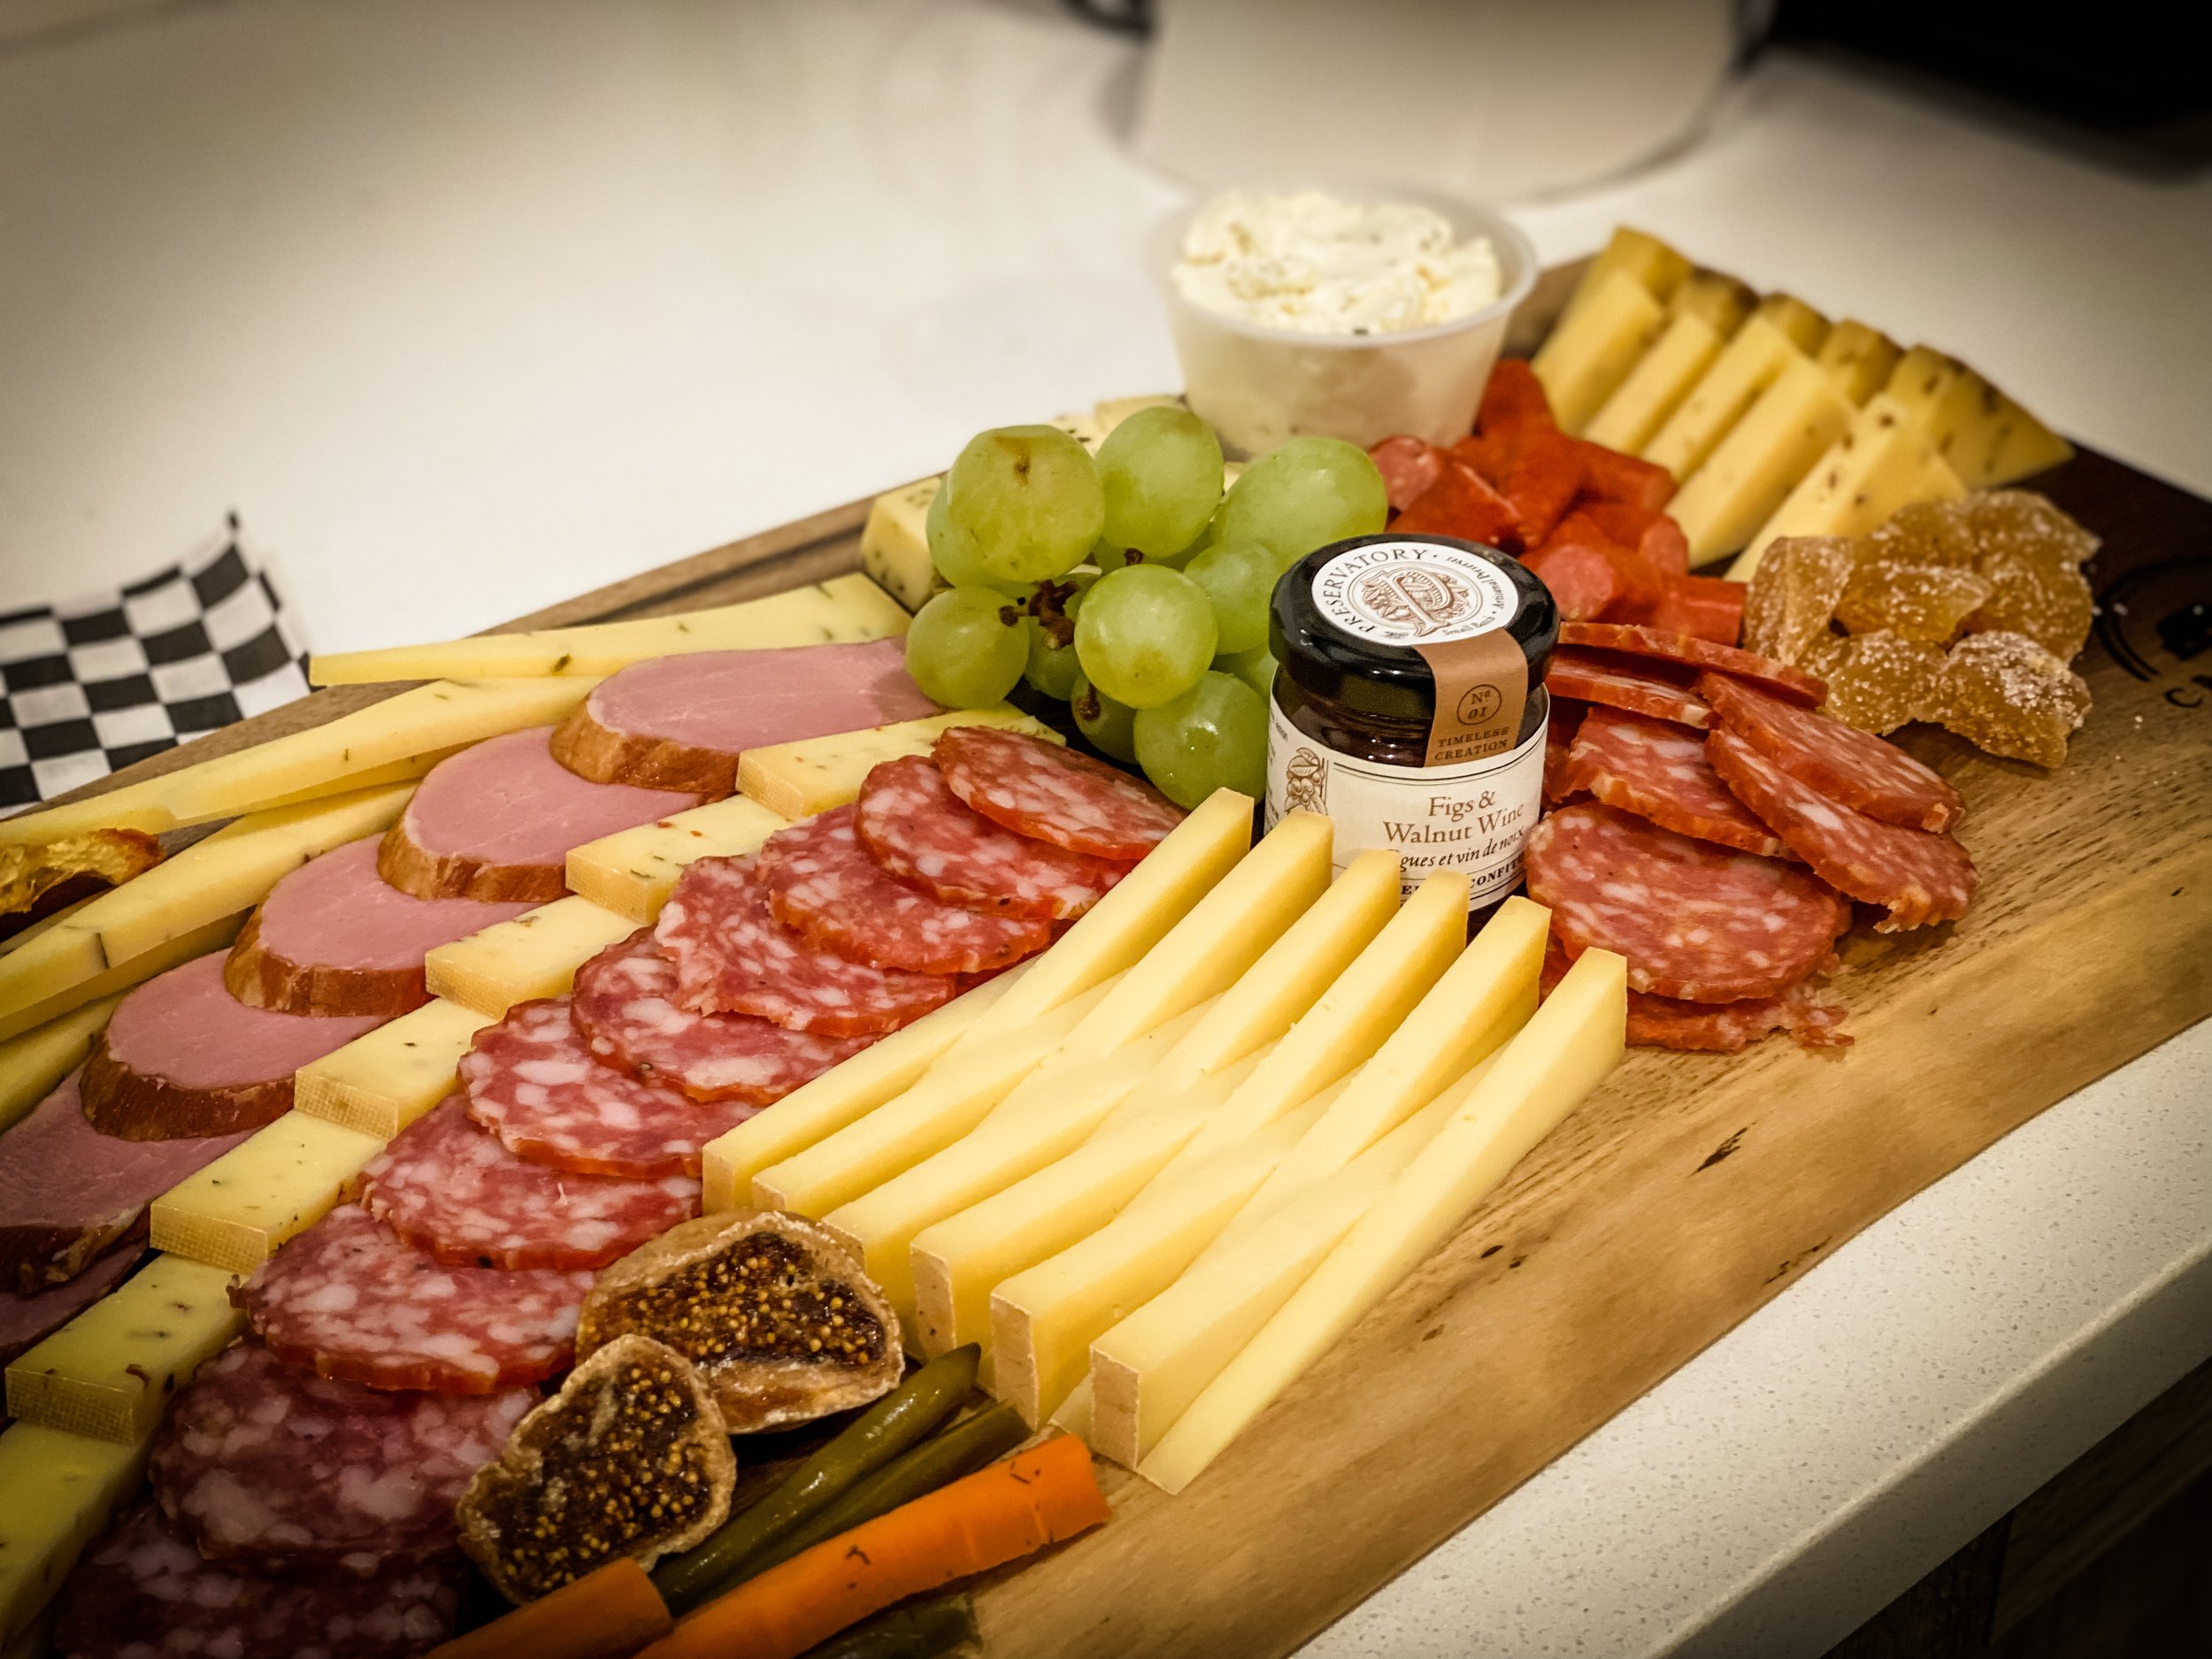
We suggest using a variety of hard, soft, and bloomy rind cheeses on your board. Combine these with several local charcuterie items, fresh and dried fruits, and assorted accompaniments such as nuts, preserves, crackers, bread, pickled vegetables. The possibilities are only limited by your imagination!
Step TWO: choose a board. We have some beautiful handcrafted boards made by our master woodworker friend Jim here in the store, but do not feel like you need to specifically use a board. Other options like serving trays or even baking sheets covered in parchment paper work very well too! We spent a few days in Ontario earlier this fall, and I created two boards on baking sheets for my in-laws’ anniversary. They turned out beautifully - see for yourself below!


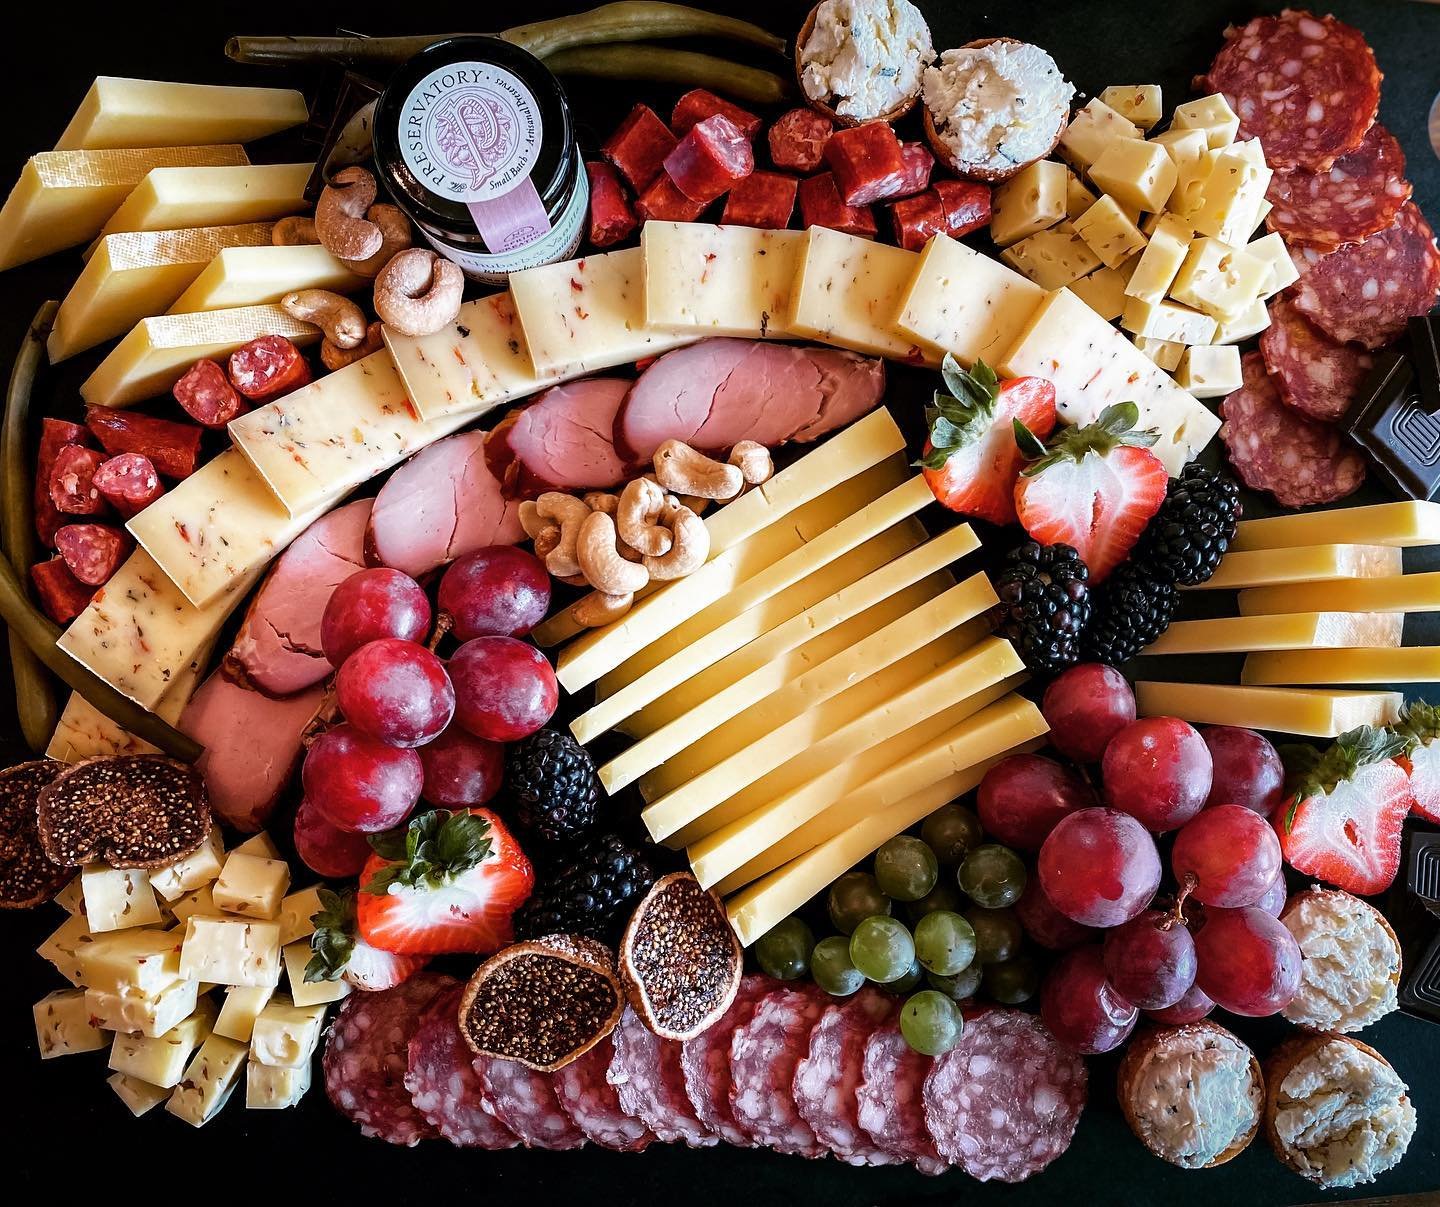
On this board we are using:
Creekside Raclette: a creamy, washed rind alpine style cheese
Creekside Sundried Tomato and Italian Herb: washed rind cheese flavoured with sundried tomatoes, garlic, and italian herbs
Creekside Nettle Gouda: semi soft Gouda flavoured with a mixture of dried nettles, chives, onion, and garlic.
Creekside Herbed Fromage Blanc: soft spreadable cheese. herb + garlic style
Johnston’s wine salami
Johnston’s hungarian salami
Johnston’s garlic infused smoked pork tenderloin
Johnston’s mild pepperoni
fresh grapes
dried orange and apple slices
pickled beans
candied ginger
local hazelnuts
Step THREE: Cut up your cheese and charcuterie. Use a variety of shapes for your cheese, including triangles, slices, and cubes. Triangles can be layered or stacked to provide visual interest. Cubes can be piled for a less structured feel. Slice charcuterie. Wash fresh produce and berries.

Step FOUR:
begin placing your cheese and charcuterie on the grazing board. We usually start with a “charcuterie river” - slices of charcuterie laid out in a wavy or curved line - and then build the board out from there.

Step FIVE:
Place the rest of the cheese and charcuterie. A variety of shapes and textures will add visual appeal.
We often use the interlocking triangles for our hard cheese - the zipper effect is quite striking!

Try using different styles of cheese triangles!

Step SIX:
Begin placing your accompaniments.

Step SEVEN:
Add the fruits, pickled vegetables, and nuts. Scatter these over the board to provide colour contrast to the cheese + charcuterie.
And you’re DONE! All that remains is placing your handiwork in front of your guests and watching them exclaim in delight as they start to dig in.
Oh - one more thing: if you create your own board (using our cheese or from another cheesemaker) - be sure to tag us if you post a photo on social media. We love seeing other grazing board creations and this way we can all celebrate your grazing board skills together!
cheers,
Julaine